Vintage Charm in Modern Kitchens
Discover how to blend retro vibes with modern functionality in your kitchen for a heartwarming space that feels timeless and practical.

Have you ever walked into a kitchen that instantly transports you back in time, yet feels perfectly equipped for today's busy life? That's the magic of vintage-inspired kitchens—a seamless fusion of nostalgic charm and contemporary efficiency. In this post, we'll dive deep into unlocking that charm, exploring ways to create a space that's not just beautiful but truly functional. Drawing from real homeowner experiences, we'll break it down technically, with precise measurements, material recommendations, and step-by-step guidance to help you achieve a heartwarming kitchen makeover.
What Makes a Vintage-Inspired Kitchen So Appealing?
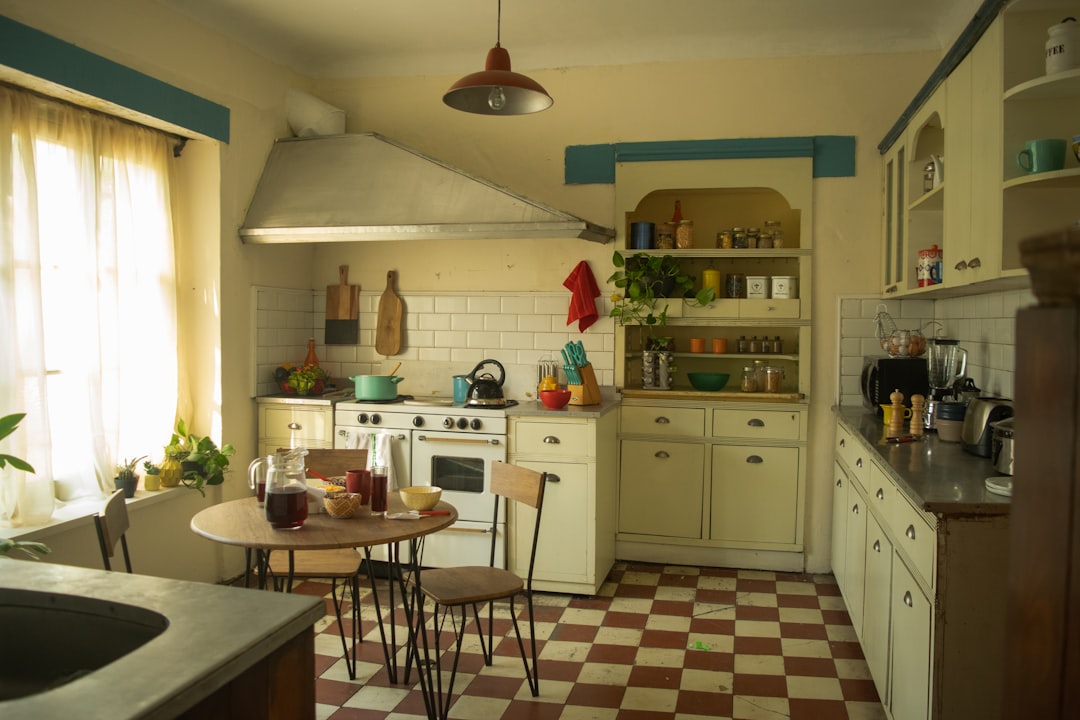
Vintage kitchens evoke a sense of warmth and history, often reminding us of simpler times. But what exactly draws people to this style? It's the blend of retro aesthetics—like checkerboard floors or pastel appliances—with modern upgrades that make daily tasks effortless. Think about it: a kitchen where you can whip up family meals without sacrificing style. We've seen homeowners in places like the cozy suburbs of New England transform cramped spaces into inviting hubs by incorporating these elements. For instance, one family shared how adding a vintage-style farmhouse sink turned their kitchen from drab to delightful, all while integrating smart storage solutions.
This appeal lies in the emotional connection. Kitchens are the heart of the home, after all. Blending old and new creates a timeless retro kitchen style that's both charming and practical. And let's not forget the budget-friendly aspect—many vintage finds can be sourced affordably from local flea markets or online marketplaces.

The Answer: Balancing Retro Vibes and Modern Needs
To unlock the charm, focus on harmony between aesthetics and utility. Retro vibes come from elements like bold patterns, brass hardware, and curved lines, while modern functionality means efficient layouts, durable materials, and tech integrations. The key is selectivity—don't overcrowd with antiques; instead, curate pieces that enhance usability.
Consider materials: Opt for quartz countertops mimicking vintage marble (e.g., 1.5-inch thick slabs for durability) paired with reclaimed wood cabinets. This blend ensures the space withstands daily wear while looking authentically retro. In terms of measurements, aim for a work triangle (sink, stove, fridge) with sides between 4-9 feet for optimal flow, adapting retro layouts to modern ergonomics.
We've noticed in Midwestern homes how this balance creates heartwarming spaces. One anecdote: A couple revamped their 1950s kitchen by installing subway tiles (3x6 inches) alongside induction cooktops, proving that retro doesn't mean outdated.
Real-World Examples of Retro Modern Kitchen Blends
Let's look at some inspiring cases. First, the checkerboard floor revival. In a California bungalow, homeowners laid 12x12-inch black-and-white vinyl tiles, costing about $2 per square foot, then added sleek stainless-steel appliances for contrast. The result? A functional vintage kitchen that's easy to clean and visually striking.
Another example: Pastel-colored cabinets. Picture soft mint green shaker-style doors (standard 36-inch height) combined with matte black hardware and smart lighting. A family in the Pacific Northwest did this, incorporating pull-out drawers (18 inches deep) for modern storage, turning their space into a timeless retro haven.
- Farmhouse Sink Integration: A porcelain apron-front sink (33 inches wide, 10 inches deep) paired with touchless faucets.
- Open Shelving with Vintage Glassware: Shelves at 12-inch intervals displaying mid-century dishes, backed by LED under-cabinet lights.
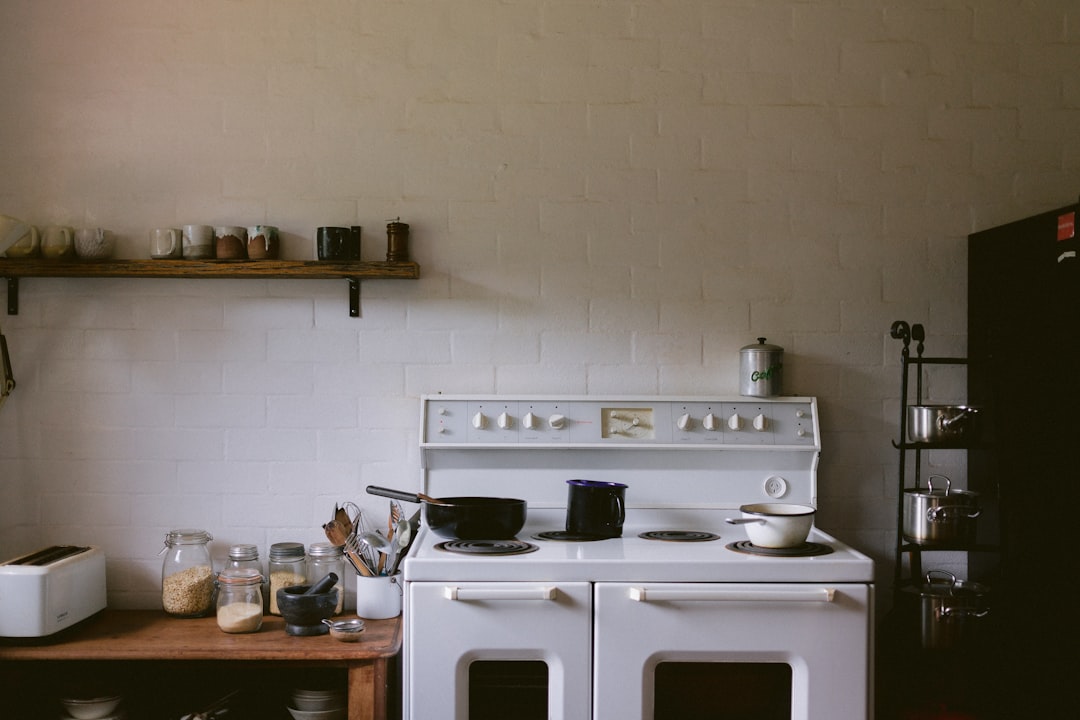
- Retro Appliances in Modern Guise: Smeg-style fridges with energy-efficient interiors.
Shifting gears, consider a loft in urban Chicago where exposed brick walls (original to the building) meet high-tech islands with built-in charging ports. The owners used reclaimed barn wood for counter extensions (48 inches long, 1-inch thick) to add warmth without compromising on modern prep space.
How to Create Your Own Vintage-Inspired Kitchen: Step-by-Step Guide
Ready to get hands-on? Here's a detailed how-to, complete with measurements and materials for a charming vintage kitchen upgrade.
1. Assess Your Space: Measure your kitchen's footprint. For a standard 10x10-foot area, plan for at least 36 inches of walkway space. Use graph paper to sketch layouts, ensuring the retro elements fit without cluttering.
2. Choose Core Materials: Select durable yet nostalgic options. For countertops, go with butcher block (2 inches thick, maple wood) sealed with food-safe mineral oil. Pair with backsplashes of penny tiles (0.75-inch diameter, ceramic) for that retro pop.
3. Incorporate Retro Features: Install cabinetry with beadboard panels (1/4-inch thick plywood inserts). Add hardware like bin pulls in antique brass. For flooring, consider linoleum in patterns (e.g., 18x18-inch tiles) that's resilient underfoot.
4. Add Modern Functionality: Integrate appliances like a 30-inch wide gas range with convection ovens. Include pull-out pantries (12 inches wide, 72 inches tall) and soft-close drawers for efficiency.
5. Lighting and Details: Hang pendant lights (12-inch diameter shades in milk glass) over islands. Use dimmable LED bulbs (2700K warm white) to mimic vintage glow while saving energy.
6. Finalize with Decor: Display vintage kitchen decor ideas like enamelware on open shelves. Ensure everything ties back to a cohesive palette—think soft blues and creams.
Throughout this process, budget wisely. Materials like vinyl flooring can run $1-3 per square foot, while custom cabinets might hit $200 per linear foot. Always source from reputable suppliers for quality.
Diving deeper, let's talk about integrating smart tech subtly. For example, embed USB ports in 1-inch thick outlet covers that blend with retro switch plates. This keeps the space functional without disrupting the vibe. One tip: Test layouts with painter's tape on the floor to visualize flow before committing.
We've heard from homeowners who started small—like swapping out knobs—and ended up with full transformations. It's all about building confidence step by step.
Troubleshooting Common Challenges in Vintage Kitchen Makeovers
Blending styles isn't always smooth. What if your retro finds clash with modern needs? Or budget overruns hit?
First, space constraints. In smaller kitchens (under 100 square feet), avoid bulky vintage pieces. Instead, use wall-mounted racks (24 inches wide) for storage. Warning: Measure twice—incorrect sizing leads to costly fixes.
Material mismatches can occur too. Reclaimed wood might warp if not treated; apply polyurethane sealant (two coats) for protection. If colors feel off, use paint samples (e.g., Behr's Retro Mint in eggshell finish) to test.
Functionality pitfalls: Old appliances may lack efficiency. Solution: Retrofit with modern internals, like insulating a vintage fridge door with 1-inch foam panels.
Budget issues? Prioritize. Start with paint (one gallon covers 350 square feet) over full renos. And here's a quirky tip from Southern homes: Use thrifted linens as curtains for a cheap charm boost, but ensure they're flame-retardant near stoves.
Reflecting on this, many face the 'over-retro' trap—too much nostalgia makes spaces feel dated. Balance with sleek lines, like a 42-inch modern hood over a retro stove.
Another common snag: Lighting mismatches. Vintage fixtures might not provide enough lumens. Upgrade to bulbs with 800 lumens each, spaced 24 inches apart for even coverage.
Next Steps: Bringing It All Together and Beyond
You've got the blueprint—now take action! Start by auditing your current kitchen: List three retro elements you love and three modern upgrades needed. Then, sketch a plan incorporating our tips.
For deeper dives, explore related ideas like seasonal decor tweaks—add harvest-themed vintage jars in fall. Or, consider expanding to adjacent spaces for a cohesive home flow.
Encouragement ahead: Your kitchen can be that heartwarming space where memories are made. Don't rush; enjoy the process. After all, blending retro modern kitchen vibes is about creating joy, one detail at a time.
As you embark on this, remember: Small changes yield big impacts. We've seen it transform ordinary homes into cherished retreats. What's stopping you? Grab those measuring tapes and let's unlock that charm!
Shop The Look
Get the items featured in this post and bring the style home.


Next Post
Coming Soon →